Grid Array Analysis Overview
When an image with a Grid Array Analysis is the current image, the Grid Analysis tab is shown on the ribbon. To apply a Grid Array Analysis to any image, click the quick launch button at the top of the window and select Grid Array from the drop-down menu. Or, open the Analysis tab and select Grid Array from the drop-down menu in the Type group. The last used parameters are used to create the new analysis.

Grid Group
A grid array is placed on the image based on the last used settings when a Grid Array Analysis is applied.
- To draw a new grid array, click the Redraw Boundary button and click and drag a bounding box on the image.
- To adjust the grid array, select the bounding box and drag the green arrows on each side. To move the entire grid array, drag the double arrows that appear when hovering on the image.
- Adjust the number of rows and columns by entering new values or using the up or down arrows to incrementally increase or decrease the number of rows or columns.
-
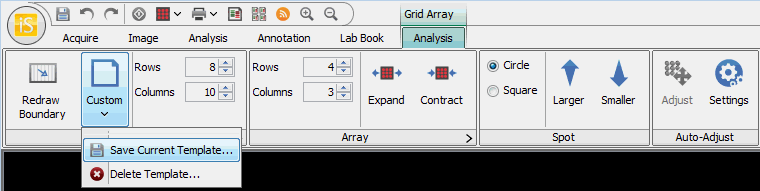
Click on the Grid Array Template button to choose save, or delete a template that determines the Grid, Array, Spot, and Background method settings.
Templates are useful for quickly selecting the settings that are commonly used, however, you do not need to use a template to set up a Grid Array Analysis.
- The Grid Array Template button resets to Custom when any of the Grid, Array, Spot, or Background method settings are changed. To save the current settings to a new template, click the Grid Array Template button and choose Save Current Template... from the drop-down menu.
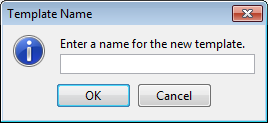
- Enter a name for the new template and click OK.
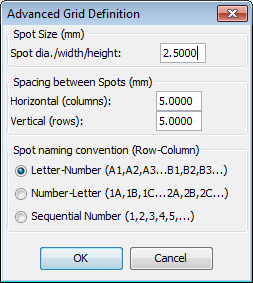
- Click the small arrow at the right edge of the Grid group to open the Advanced Array Definition dialog where you can set the spacing between arrays numerically and choose how the arrays are named.
Array Group
- To adjust the number of rows and columns in the arrays, enter new values or use the up and down arrows to incrementally increase or decrease the number of rows or columns. All of the arrays are changed.
- Use the Expand and Contract buttons to incrementally move the spots in the arrays.
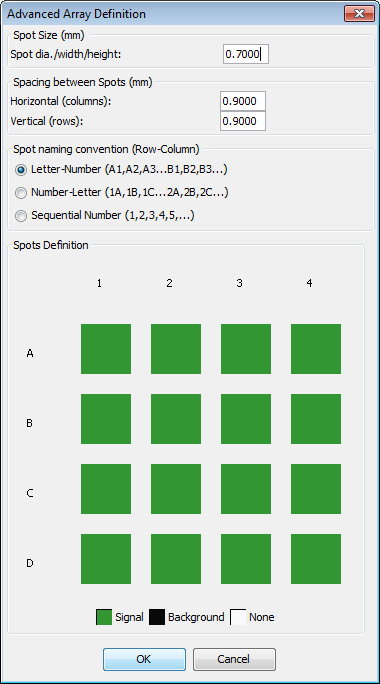
- Click the small arrow at the right edge of the Array group to open the Advanced Array Definition dialog where you can set the spot size, spacing between the spots in the arrays, and how the spots are named. Use the grid to define each spot as either Signal, Background, or None.
Spot Group
Use the Circle or Square buttons in the Spot group to select the shape of the spots. Use the Larger or Smaller buttons to incrementally adjust the size of the spots for a better fit.
Auto-Adjust Group
Automatically moves the spots to the areas of high pixel intensity near them.
Plate And Grid Array Background Group
The following options are available in the Background group.
-
 Background list - Choose a background subtraction method from the Background list.
 - Array - Allows the same spots to be designated as background in each sub-grid of an array.
- Average - Uses space surrounding a spot as background.
- Median - Uses space surrounding a spot as background.
- User-Defined - A spot or spots must be designated as background.
- None - Unless data are going to be exported for analysis using a third-party software, do not choose None.
-
 Assign - When the User-Defined background method is chosen, this button is used to assign a spot to be used for background calculation.
 -
 Unassign - Removes a User-Defined background spot from the background calculation.
Show Group
Use the controls in the Show group to specify what to display on the image. You can display Spots, Labels, Quantification, Grid Border, and Local Background (see Show Group for further details).